Export Heightmaps from QGIS by Screenshot

Category

Last modified

22 July 2018

Introduction

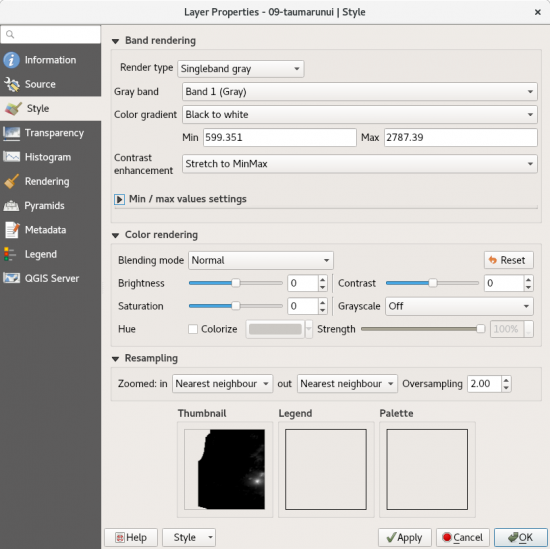
This tutorial shows how to export heightmaps from QGIS 3.0.1 by using the screenshot method. If you have one heightmap then load it in QGIS, zoom in on your area, and press the PRINT SCREEN key.

If you have two heightmaps, or you want greater accuracy, read on...

QGIS is free open source software and can be downloaded from the QGIS website. It runs on Linux, MacOS X, and Windows. The reason for using it is that it can open a variety of Data Elevation Model (DEM) file formats. DEM is the term used in the geographical world for heightmaps.

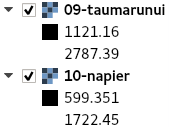
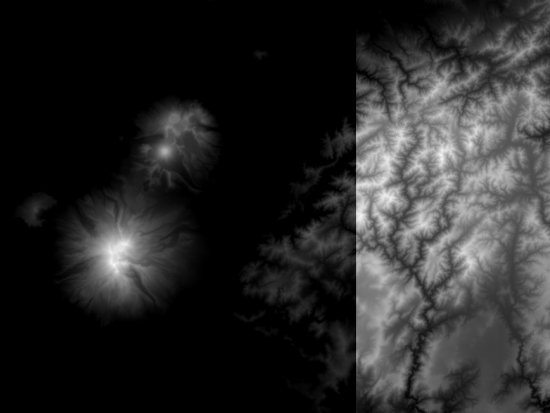
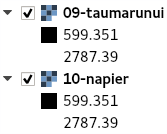
For this tutorial I am using two heightmaps containing the volcanoes Mt Ruapehu and Mt Ngauruhoe:-

Mt Ruapehu & Mt Ngauruhoe heightmap


Greater Accuracy

QGIS uses a grayscale of 256 shades (8 bits). If you had a mountain that was 2560m above sea level, each shade of gray would equal 10m. If that mountain was on a plateau, that was 2560m high, it'd be 5120m. Then each shade would be 20m. QGIS can fix this. QGIS can adjust this for you.


  1. Zoom in so that your area fills the window
  2. RMB on a heightmap layer and select Stretch Using Current Extent.

Below are before and after examples of the benefits:-

Stretch Using Current Extent

Mt Ruapehu with grayscale starting at 0m and ending at 5000m


Mt Ruapehu with grayscale starting at 1121m and ending at 2787m


Two or More Tiles

The range of heights on each tile may differ. If they do you may see seam between them. The solution is to find the lowest and highest point and apply a grayscale over that range for each tile.

Mismatched Heights
Mismatched heights
Two Heightmap Tiles - Mismatched Grayscales

For each layer:-

  1. Double click on the layer
  2. Go to the style tab
    Style Tab
  3. Adjust the Min Max
    MinMax
  4. Click OK
    OK


Adjust MinMax

Once done all the layers should have the same values, e.g.:-
 

Corrected Heights
Corrected Heights


Corrected Grayscales

Export

Crop Square 1:1

To export press PRINT SCREEN and then paste into your favourite photo editor and crop square.

Crop Square

Do Better

For a better quality method see my Export Height Maps by QGIS Print Layout tutorial.

Going further

Make Mountains in Blender from Heightmaps
These exported heightmaps can then be used to create 3d models. You can do this with any good 3d modelling software. I do this using, the free software, Blender.

Discussion

Brian
or you could save as GeoTIFF/Arc_Ascii and run them through this Python Utility to produce a greyscale PNG file https://github.com/MacroPolo/real-terrain I use these in UNREAL but need to be one of the "required" sizes that UNREAL supports

Add a remark

Your email will be private. It is used to notify you of replies to your remark.

Plain text

  • No HTML tags allowed.