Two Tone Non Photo Real Shader
Category
Last modified
18 November 2023
Blender can shade objects so that they look similar to art created by 2d art packages. The great advantage of Blender is that changing the angle of the lighting or rotating the object is trivial. A 2d drawing would require substantial, or total, rework. This tutorial will show you how to create a two toned Non Photo Real (NPR) shader with the (default) EEVEE render engine.
Download Bananas - Tutorial Start.blend to follow along.
Moving the light source or rotating the object is trivial in Blender.
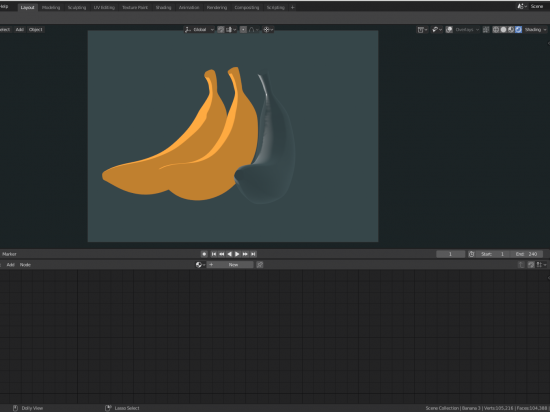
Screenshot of the bananas from the tutorial .blend file.
Set up the scene
Change to Render Preview mode  and you'll see that two Bananas have been shaded for you and the third is ready for you to experiment on.

Add a new material and a Diffuse BSDF shader
Select the right hand banana LMB and then give it a new material:-

Delete the Principled BSDF shader. LMB to select and X to delete:-

Add in a Diffuse BSDF shader.
SHIFT A >> Shader >> Diffuse BSDF and drop it on the far left of the node window by LMB click.

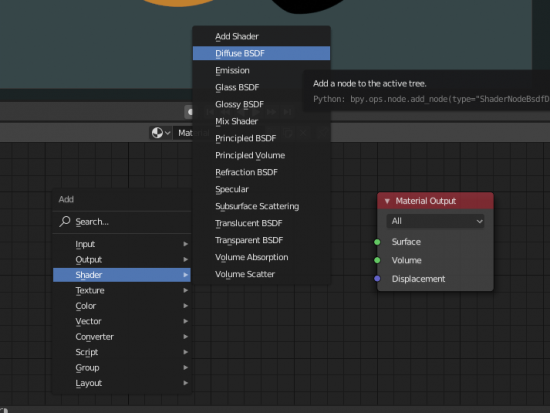
This is the menu path to find the Diffuse BSDF shader. We use it to find out where the light falls on the banana and where it is in shadow.
Convert the shader to RGB
We need to convert the shader information about light and shadow into RGB.
SHIFT A >> Converter >> Shader to RGB and drop it to the right of the BSDF Shader by LMB click.
Connect the BSDF Shader to the Converter by LMB dragging from the BSDF socket to the Shader's.

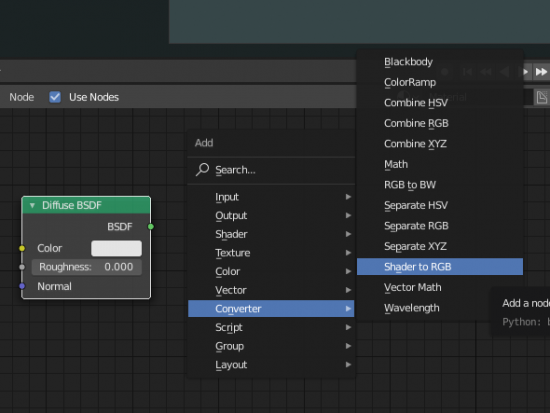
This is the menu path to find the Shader to RGB converter.
Add a ColorRamp
We will then convert the RGB information into two tones using a ColorRamp.
SHIFT A >> Converter >> ColorRamp and drop it to the right of the Shader to RGB by LMB click.
Connect the Shader to RGB to the ColorRamp by LMB dragging from the Color socket to the Fac's.

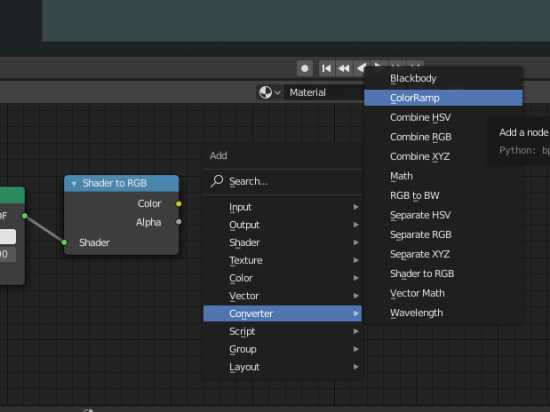
This is the menu path to find the ColorRamp.
Setup the ColorRamp with two tones
Change from the ColorRamp from Linear to Ease. This changes how the gradient between the tones is created:-
 >>
>> 
Add in another colour stop and then alter each colour to a suitable yellow. The first two stops will be the same darker yellow and will form the shadow.

Slide the stops towards the left. the closer the stops are the more abrupt the change in colour. If you want a soft gradient then increase the distance.

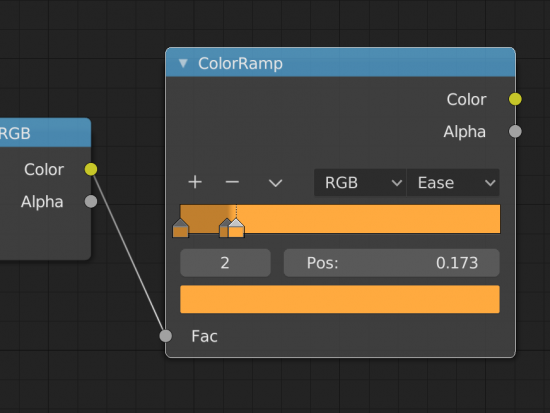
The ColorRamp with two yellow tones that will shade the banana.
Add an Emission Shader
To give the banana it's colour we ignore the lights in the scene and we turn it into a lamp by using an Emission Shader. This causes it to emit light in our chosen colours.
SHIFT A >> Shader >> Emission Shader and drop it between the ColorRamp and the Material Output by LMB click.
Connect the ColorRamp to the Emission Shader by LMB dragging from the Color socket to the other Color.

Connect the Emission Shader to the Material Output by LMB dragging from the Emission socket to Surface's.

Your banana should now be shaded. If it isn't, compare your node set up with the example below:-
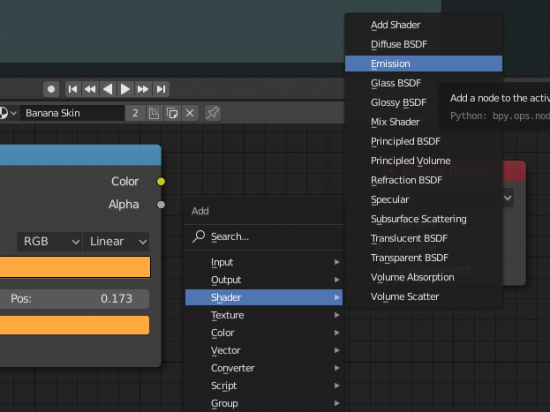
This is the menu path to find the Emission Shader.

This is the node set up that takes the shading created by the lamp and converts it into two tones.
Add a remark